Authentication icon for Verified Senders in Gmail
Steps to enable Authentication icon for verified senders1. Log in to your Gmail account
2. Move to Gmail Labs settings and find out “Authentication icon for verified senders”
3. Enable Authentication icon for verified senders as shown above picture
4. Save settings and check your Gmail inbox
Sometimes, you may get the same type of emails in your inbox. May be, your blog readers continue asking the same question to you using the contact form and you feel tired of typing the same reply over and over again. You can use Gmail canned responses to compose your reply once and save the message for later use. A canned response works like an email template – you compose it once, save it and can paste the entire message in a reply later on.
Gmail canned responses is simple to use and do not involve so many steps. In this tutorial, we will learn how to use Gmail canned responses to save email templates for future use.
Create Email Templates Using Gmail Canned Responses
1. Log in to your Gmail account, click settings and select the “Labs” tab. You will find a Gmail labs feature as “Canned responses” under the Available labs section ( It’s 5th from the top). Select the radio button “Enable” and hit “Save changes” at the bottom of the page.
2. After the Canned response feature has been activated, go to the “Compose Mail” section of your inbox and you will see a new drop down as “Canned Response”. It will be empty at this moment but we will learn how to create and use a canned response in the following steps.

3. To create a Canned response, pull down the canned response menu and select “New Canned Response”. This will open a browser pop up window where you have to enter a name for the canned response.

Make sure you choose a relevant name for the canned response, because choosing something like “response 1″ may lead to confusion at a later point of time. You will have to look into the body of the response, which in turn will not solve the purpose of using a canned response altogether.
4. Next, type the response in the message field and hit “Save”.

That’s it, your canned response is ready to be used and will be accessible from the canned response dropdown menu. Whenever you get the same type of email message, whose response you have already saved as a “canned response” – simply choose the canned response from the dropdown and the message will be pasted in the email body automatically. No need to type the whole message all over from start!

Autoreply to Selected messages with Gmail Canned Responses
Canned responses, combined with Gmail filters can be even more useful. You can automatically reply to selected messages by creating a filter and selecting a canned response.For example: Suppose you have a blog and get frequent emails for guest articles. It would be a good idea to send an auto responder whenever someone requests to publish a guest article on your blog. Following are the steps involved to combine Gmail filters and canned responses:
1. Log into your Gmail account and go to Settings. Choose the “Filters” tab and click on “Create a New filter”.

2. In the next step, select the rules which you want to apply to the Gmail filter. This may include a “From” email address, a particular subject or may be some specific words in the email body. In our example, we use the subject line as the condition for Gmail filter and use the phrase “Guest article”.

3. Click “Next step and select the action you want to perform once an email with the specified condition hits your inbox. If you want to send an auto response, choose the “Send canned response” check box and select the canned response you want to send.

4. Hit “Create Filter” and you are done.
Now whenever you get an email with the subject line as “Guest article”, your canned response will be automatically sent to the sender. This is very useful, when you are away from work and want to send auto replies to specific email messages.
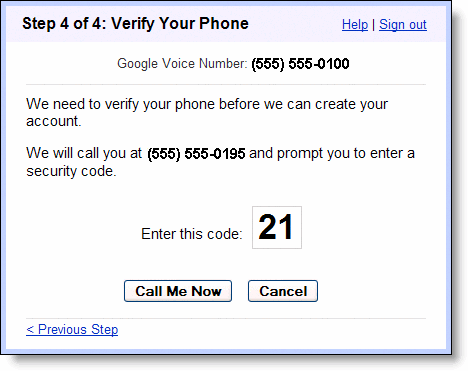
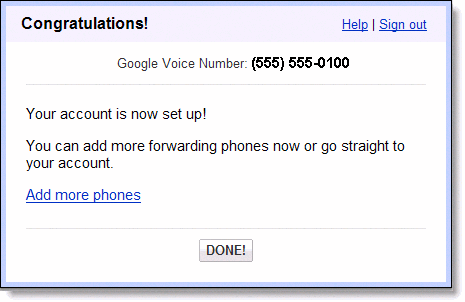
Getting Started: Choosing your Google numberGoogle Voice lets you choose a new phone number that is tied to you, not to a device or location. Google Voice doesn't use the phone number of your exisiting mobile device or landline - you select a new number when signing up and that will be the one number you can use for all your phones. If a user calls your Google Voice number you can set it to ring up to six different phones, including your work, mobile, and home phones. You can manage which phones will ring and set custom voicemail greetings and call rules for your different contacts. Find out more about the basics of Google Voice and how it works. Ready to sign up for Google Voice? Here's a preview of the number selection process and some tips to keep in mind when choosing and setting up your number:
 You can click Next 5> to see additional available numbers that meet your search criteria, or you can re-enter a different area code or word and click Search again to search for other available Google numbers. 

| Getting |
Basics: About the 'Google Voice player in mail' Gmail lab
If you're both a Gmail and Google Voice user, take advantage of the Google Voice player in mail lab so that you can listen to your voicemail messages right from Gmail!
Once you enable the lab in your Gmail Settings, you will see the Google Voice player at the bottom of voicemail notifications you receive in Gmail. You can press the play icon to begin playing your messages right in your Gmail inbox.
To enable Gmail labs, follow these steps:
Please note that since Gmail labs are exeperimental features, it's important to keep the following things in mind about the Google Voice player in mail lab and other Gmail labs you may be using:
Once you enable the lab in your Gmail Settings, you will see the Google Voice player at the bottom of voicemail notifications you receive in Gmail. You can press the play icon to begin playing your messages right in your Gmail inbox.
To enable Gmail labs, follow these steps:
- Sign in to Gmail and click Settings in the top right of your Gmail page.
- Select the Labs tab and find the Google Voice player in mail lab and any other labs you may be interested in.
- Click the 'Enable' radio button to turn on a lab and click 'Save Changes' at the bottom of the page. Your page may refresh but after the refresh, the lab you just turned on will be available in Gmail.
Please note that since Gmail labs are exeperimental features, it's important to keep the following things in mind about the Google Voice player in mail lab and other Gmail labs you may be using:
- They may break at any time.
- Similarly, they may disappear temporarily or permanently.
- They may work so well that they graduate and become regular features.


